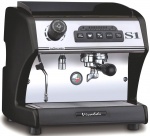
LaSpaziale S1 Vivaldi I Website
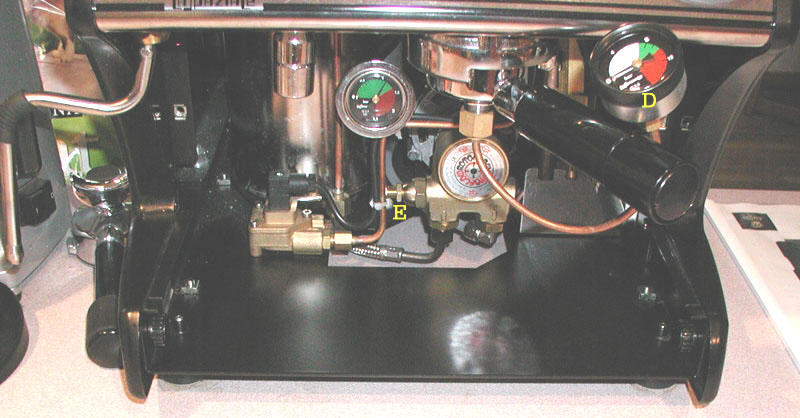
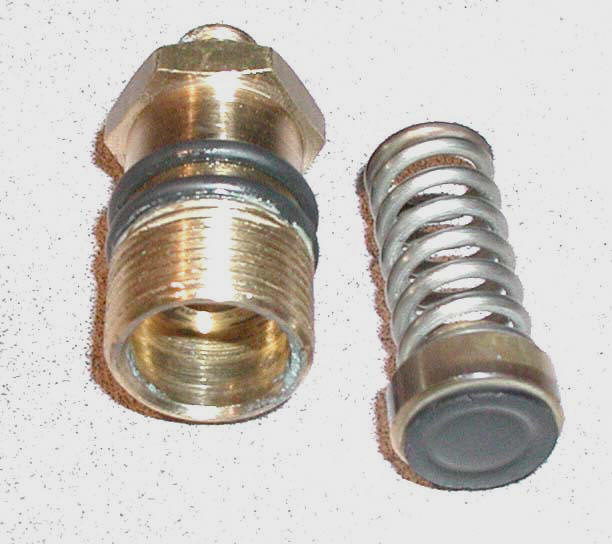
Expansion Valve R&R

When the LaSpaziale S1 Vivaldi VI ships from the factory the Expansion valve on the group boiler should be set to open at ~12.5bar. If you have reason to doubt that it is properly set or if you're a techie that just can't leave things alone, here are the directions required to calibrate this valve.

PF Pressure Gauge
  • Back flush unit so grounds won't plug the portafilter pressure gauge. To ensure longevity of the gauge, use a basket in the portafilter to further filter grounds.
  • Let unit cool down. The following adjustments do not require a hot unit and they will be easier to make without the possibility of burns.
  • Remove the portafilter and drip pan.
  • Use either a large slotted or a Phillips screwdriver to remove the two screws attaching the chrome front panel.
  • Remove the front panel
  • Attach a portafilter pressure gauge to the group. The LaSpaziale model pressure gauge shown at left "D" can be purchased from Chris Coffee at this link.
  • Additional tools required for the next steps:
    A - 14mm box wrench
    B - 10mm box wrench
    C - 21mm  socket wrench  (A 7/8" socket will work in a pinch!)
expanson valve adjustment
  1. Adjust the group pressure to 12.5 bar per the following instructions: a) Loosen lock nut "A" using the 14mm
    b) Tighten nut "B" 1-2 turns using the 10mm wrench
    c) Turn on pump until pressure on the PF gauge stabilizes
    d) Repeat steps b & c until pressure reads 12.5 bar
  2. The expansion valve should open at 12.5 bar
  3. If no water is dripping or running from the tube below nut "C" at 12.5 bar the expansion valve is set too high. Use the 21mm socket to loosen nut "C" (rotate counter-clockwise as viewed from the bottom of this valve) until the valve just opens when running the pump as the pressure reaches 12.5 bar.
  4. If water is pouring out of tube below "C" before the pressure hits 12.5 bar, use the 21mm socket to tighten nut "C" (rotate clockwise and viewed from the bottom of this valve) until the valve is just opening at this pressure. If you back off the PF pressure to 12 bar all dripping should stop - though it may take a minute or two for residual moisture to drip out.
  5. Once you are convinced that the expansion valve is properly calibrated, readjust the rotary pump pressure by unscrewing "B" to reach your preferred pressure - normally in the range of 8.2 to 9.0 bar. Then tighten lock nut "A".

Notes:

  1. Make small adjustments, then turn the pump on and check. Don't attempt any of these adjustments while the pump is on.
  2. 2The copper tube denoted by the letter "D" exits the flow gauge here and then attaches to the top of the Expansion valve.
If the above procedure keeps your S1 Vivaldi VI's Expansion valve from running or leaking when pulling a shot but it drips intermittently when the unit is idle, you may want to disassemble and clean the inside of the valve. It is possible that metal shavings or other debris are lodged inside the valve. Follow the instructions below. If you still gets drips after following this procedure,please contact Chris Coffee.
Expansion Valve Components
  1. Turn off the S1 Vivaldi VI and let the machine cool down.
  2. Turn off the water supply to the S1 Vivaldi VI.
  3. Mark a line with a Sharpie pen where indicated by the letter "D in the previous photo on the smooth part of the barrel up against the brass hex body of the valve.
  4. Use a 21mm socket wrench to unscrew nut "C" in the picture above. (7/8" socket will do it a pinch.)
  5. When part "C" in the above photo is removed you will see the spring/washer assembly that was inside the valve as shown on the left.
  6. Be sure that the circular groove in the rubber washer is reasonably centered in its surface and that the indentation is of fairly even depth all the way around. If not, you should call Chris Coffee. A replacement may be required.
  7. Check that the washer surface - especially in the groove - contains no "goo", metal flakes, or other detritus.  Clean it thoroughly.
  8. Put your finger up inside the valve and be sure that there is no debris up there and that the end of the pipe that jams into the surface of the rubber washer feels clean and smooth.
  9. You may wish to replace the drip pan and turn the water supply on for several seconds in order to ensure that the inside of the valve is thoroughly flushed out.
  10. Reassemble valve and screw in to Sharpie pen line. This will take some upward. pressure to get started. I pushed up on the ratchet handle with my left hand and turned the socket with my right hand in order to get the threads engaged.
  11. Follow instructions with previous photo to complete final readjustment of expansion valve pressure.

Chas Rimpo
Copyright © 2004-2019