 |
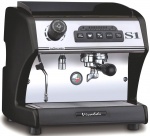
LaSpaziale S1 Vivaldi I Website
|
Steam Boiler RepairThanks to Steve in Seattle for documenting his replacement of the steam boiler heating element below: I replaced the heating element in my steam boiler recently and this is what Chris' Coffee sent me - an element and a gasket:  To start, I made sure that it was a weekend evening when there would be no one to call and no place open to pickup tools. I unplugged the S1, shut off the water supply valve (left the water line connected). I like to tip the machine up on one side to take off the covers:  In the picture above if you look closely on the bottom of the machine where the water line drapes down, you can see the boiler drain plug. If I had been aware of it ahead of time, I would have drained the boiler and also have detached it from the bottom panel by removing the drain plug. I found it later when I was trying to remove the boiler. The next shot shows the panel in the middle of the machine to which the side of the boiler is screwed. The machine screw with a washer is just below the steam tube (I already had the boiler cap off when I took this picture):  To remove the heating element, it is necessary to remove the boiler cap and the heating element wires. The 2 black boots in the middle of the boiler cap cover the heating element terminals - they pull off easily. Then the wires can be disconnected from the terminals. The next picture shows the "before":  Also, you can see the 10mm cap screws - about 9 of them and the 2 heating element mounting nuts under the black boots; they are 22mm and as I found out later, it's a lot easier to have a 22mm deep socket to take those off and put them back on (found one at Sears). Next I am removing the cap screws:  As you can see there are a couple of ground wires attached to one of the cap screws - the green wires. I wanted to unplug the 2 black wires in the white plastic connectors to theright of the socket wrench but either I didn't know the method or they were on really tight. So I left them on. Next shot shows the cap removed with the heating element sticking down at a angle into the boiler. I removed the element at this time:  After removing the heating element, I could tell that the gasket was pretty well destroyed and would have to be replaced. The next shot shows the boiler gasket and the heating element sitting disconnected inside the boiler:  I tried to pull the gasket off but it was pretty well stuck on so I started scraping it off. After some pieces fell into the boiler, I decided it would be best to take the boiler out so it would be easier to work on the gasket and to clean out the debris from the boiler. To pull it out of the machine, I disconnected the boiler plug from the bottom and the screw from the side. Also, the 3 water/steam tubes had to be disconnected - they were no problem at all. This is the boiler when it's out of the machine. Notice that the pressure gauge and tube remained connected:  With the boiler out, the gasket could be scraped out of the machined recess where it sits:  It took me about an hour to completely scrape out the gasket using a pocket knife. The next 2 pictures show the ohm readings - 1st on the old element and 2nd on the new element:   Also, here is a picture of the bottom of the boiler showing the drain plug:  The new gasket doesn't require any sealer so it is just replaced back into the recess. The heating element has a couple of white gaskets which I was able to reuse. Putting it back together was mainly a matter of reversing what I had done to take it apart. It is important to tighten up the heating element to the boiler cap while the cap is still out of the boiler so you can hold the hex part of the heating element under the boiler cap with a wrench while snugging down the 22mm mounting nuts on the top of the cap. Also, without a deep socket it is very difficult to access the 2 nuts as they are crowded in by other fittings - I tried it with a crescent wrench before I bought the socket. |