Any suggestions and/or problems removing the side panels? I plan on painting my panels and drip tray to custom match my kitchen decor.
Thanks...Derek
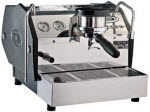
Removing Side Panels
-
chas
- Vivaldi Dreamer
- Posts: 3057
- Joined: Wed Jun 02, 2004 11:52 pm
- Location: Central Maryland
- Contact:
Going to paint some saguaros and cactus wrens on the side panels? Maybe you should buy those grey side panels from Rhinoevans so if you hate how it turns out you still have your black ones to put back on.
Steps to remove side panels:
Steps to remove side panels:
- Let unit cool down
Remove screw from warming tray and remove tray
Remove drip tray
Slightly loosen the four bottom screws
Now you can access the four thumbscrews that hold on the side and pop them off.
Chas
LM GS/3 & LaSpaziale Dream v 1.25 (US 120V)
Mazzer Kony E, Customized Rocky
Hottop P/B
LM GS/3 & LaSpaziale Dream v 1.25 (US 120V)
Mazzer Kony E, Customized Rocky
Hottop P/B
-
dsherman
-
Barry
-
chas
- Vivaldi Dreamer
- Posts: 3057
- Joined: Wed Jun 02, 2004 11:52 pm
- Location: Central Maryland
- Contact:
That reminds me of one additional important step. You can do this as part of the removal process but it's not absolutely necessary. However, it is definitely necessary to easy the side panel reinstallation process.
Once you remove the warming tray, you will see four screws just under the panel - one in each corner. The front pair attach the front control panel and the rear pair attach the rear cover. By loosening these a turn or so you will get some play in the control panel and in the rear panel. This allows you to more easily align the metal edges of those features with the slots they go into in the side panels.
Once you get them properly aligned you can rettach and tighten the side panels. The last step before reinserted the warming tray is to retighten the four screws. This will snug every thing up tight and make the S1 even quieter.
Chas
LM GS/3 & LaSpaziale Dream v 1.25 (US 120V)
Mazzer Kony E, Customized Rocky
Hottop P/B
LM GS/3 & LaSpaziale Dream v 1.25 (US 120V)
Mazzer Kony E, Customized Rocky
Hottop P/B
-
dsherman
-
dsherman
Just finished painting my side panels Ferrari red (actually Roasted Red Pepper). I knew they came out well when my Italian wife said, "Looks very Italian"!
Removing and replacing the panels was not tha big of a deal - although I wouldn't want to do it everyday. It was worth it jus to get a good look inside this machine. You can see the quality of craftsmanship.
- Derek
PS - Is there anyway to insert an image without uploading to a website? I'll post pictures if anyone's interested.
-
rhinoevans
- Vivaldi Dreamer
- Posts: 110
- Joined: Tue Aug 17, 2004 2:32 pm
- Location: Las Vegas
-
dsherman
The paint is Krylon Fusion for Plastic. It went on smoothly, dried quickly and it claims to be chip-proof in 7 days.
Here's a link to a photo:
http://www.coffeegeek.com/forums/espres ... 118#136118
- Derek

Here's a link to a photo:
http://www.coffeegeek.com/forums/espres ... 118#136118
- Derek