|
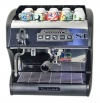
LaSpaziale S1 Vivaldi II
|
 |
|
The photos below show some key differences in the internals of the Vivaldi II relative to the original S1. Incremental modifications are made over time. Both the S1 Vivaldi I and the S1 Vivaldi II units shown below are early production models of each machine. You may see minor differences in your machine. It is a given that the wire colors will be different as LaSpaziale doesn't seem to stick to any specific wire color code. |
|
|
|
|
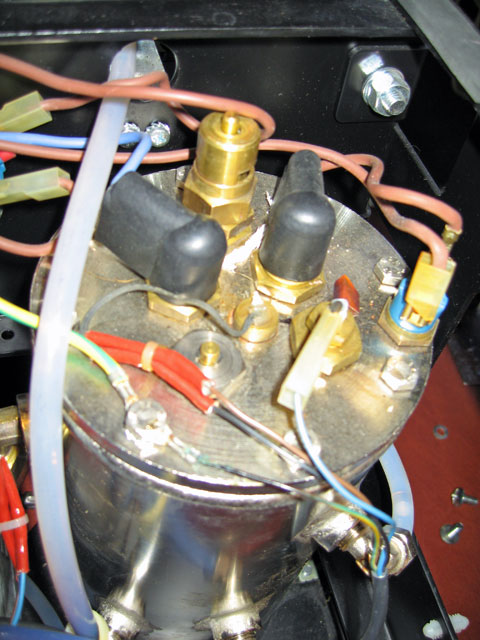
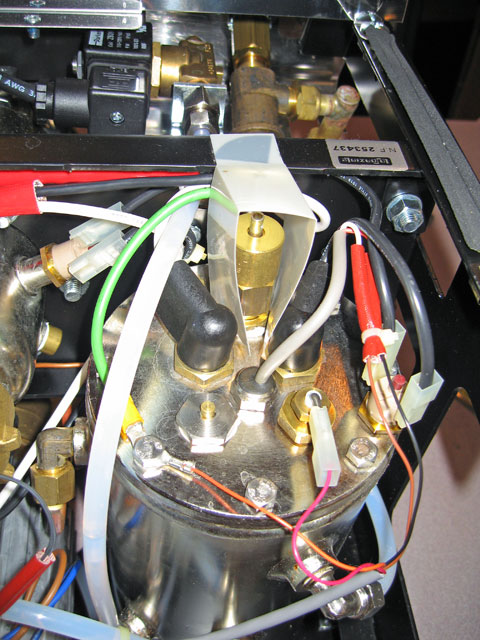
These photos show the top of the S1 boiler on the left and the VII boiler on the right. There are two key differences:
|
|
|
|
|
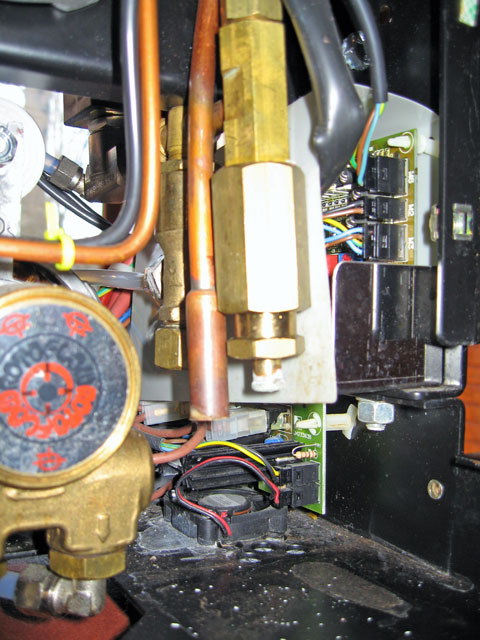
You can see the controller board on the original S1 on the left behind the orange wire bundle. It has a thin plastic cover which offers minimal protection from a hot, damp environment. The VII on the right now encases the controller board in a thick plastic case which offers excellent protection. The 15A/20A selector switch is mounted on top of this box. Newer models have been modified to assist users that wish to add the Optional Timer at a later date. There is now a 2nd switch on top of the controller box that indicates whether the timer is installed or not. There is also an extension cable for the timer coming out of the controller box and cabled tied into place behind the front chrome panel. NOTE: The timer switch MUST be set properly regardless of whether the timer is installed or not. Otherwise, strange behavior results. For users that have an early model without the above feature, you have some work ahead of you to install the timer. It requires that the controller box be removed and opened up so that the time cable can be plugged directly into the controller board. Also, in lieu of the external switch on newer models, there is a jumper that has to be properly set. |
|
|
|
|
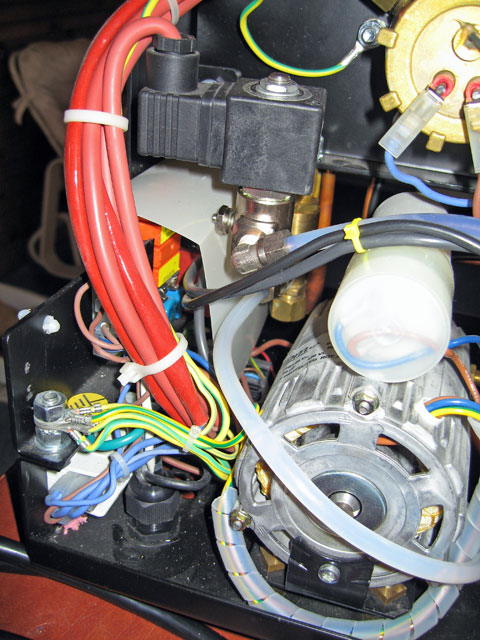
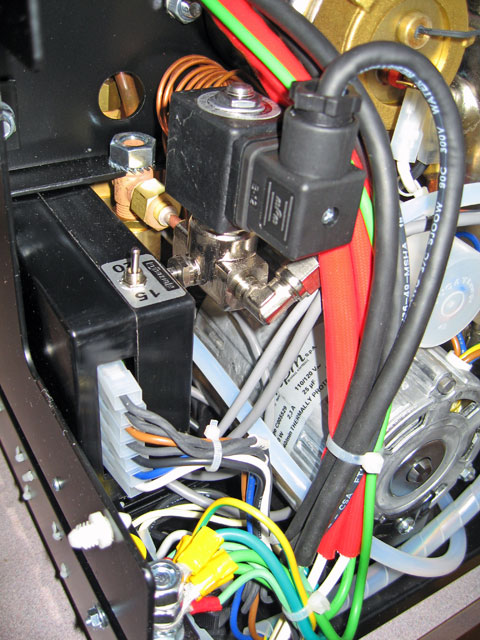
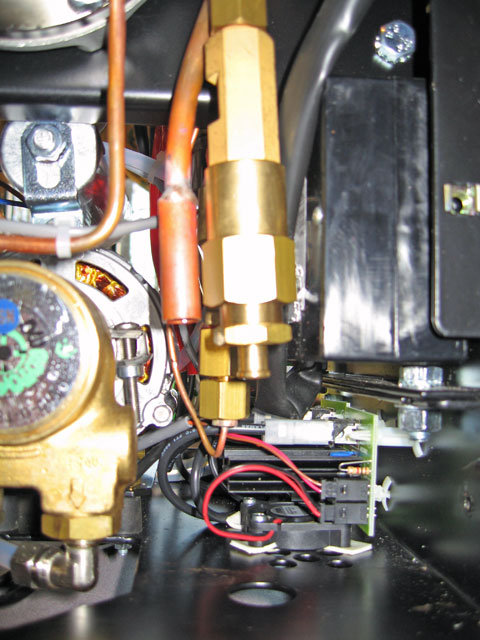
In the S1 photo on the left the vertical copper pipe in the middle of the photo is the pipe from the 3-way valve. Directly behind that is a copper fitting that has the input from the rotary pump with outputs to the group boiler and the expansion valve which is the large brass fitting adjacent to the 3-way pipe. Note that the copper fitting behind the copper 3-way pipe has a brass cap on the bottom. Compare this to the VII photo on the right. The plain brass cap on the bottom of the copper fitting has been replaced by one that is threaded on the bottom. A copper tube that goes to the new dual manometer is attached to the bottom of this fitting. Also note on the right photo that the fan quieting mod has been made to the VII boiler cooling fan mounted to the base of the chassis. This mod consists of inserting foam pad squares under the four screw holes. This is a mod recommended for both S1 and VII, as both suffer from fan whine noise due to the fact that the fan is too close to the vent holes in the chassis bottom. Update: Subsequent to the installation of the fan quieting mod above, I noticed that the foam pads eventually compressed enough that the noise came back. They have since been replaced with a couple of washers on each bolt between the fan and the chassis completely eliminating the fan noise. LaSpaziale has apparently made a change in this area - at least a different fan. Newer purchasers are not finding that this mod is required on their machines. |
|
|
|
|
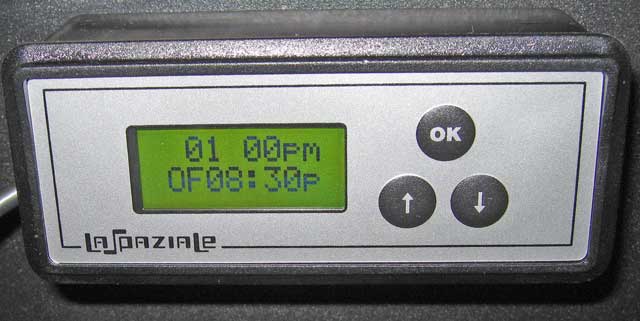
The photo on the left shows the optional On-Off timer for the VII. This is the main display that shows the current time and date. This display alternates with the one on the right which shows the current time and the next Off time. As previously noted above, this upgrade is now easily made at any time for anyone having buyer's remorse that they didn't buy it at the time of original purchase. |
|
|
|
|
|
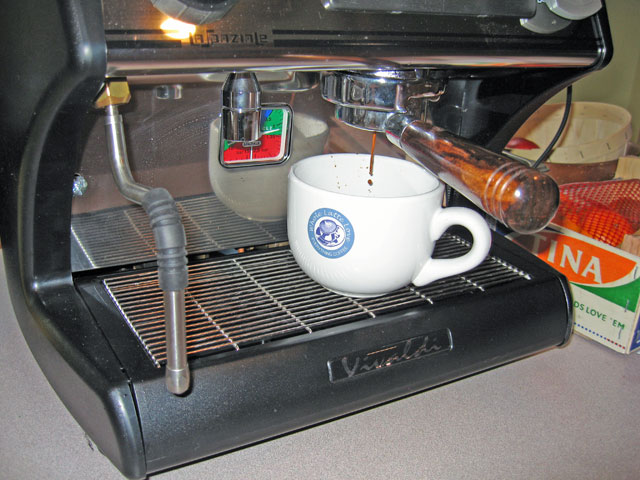
What it's all about. The perfect, syrupy naked portafilter pour. The steam arm in the photo above is the optional S5 arm available from Chris Coffee. It is about 3/4" longer with a very slight difference in the bend. Many are fine with the stock arm, but others think the S5 arm option makes all the difference when steaming milk in order to obtain microfoam perfection. |
|