 |
LaSpaziale S1 Vivaldi II
|
 |
LaSpaziale S1 Vivaldi II Frequently Asked Questions (FAQs)
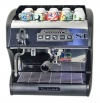
Chris Coffee Service is the US Master Importer. These are available now from other suppliers. Back to TopHow much will it cost me to leave the S1 Vivaldi II turned on 24x7? Click this link to go to the Power Analysis page. Back to TopS1 Photos. Not actual photos of the VII will be posted soon. However, the only visible difference between the original S1 and the Vivaldi two are that the S1 has a round pressure gauge and displays only steam boiler pressure. Back to TopHow accurate is the temperature control? Tests by the author on the original S1 indicate the the temperature of the water exiting the group is quite accurate relative to the set temperature with 1-2°C. Within 5 seconds of pulling a double shot the group boiler comes on for 40 sec. Consequently, shots pulled at least 45 seconds apart show consistent water temperatures. Here are those latest test results (16K PDF file). The S1 Vivaldi II has been redesigned to cycle the boilers when a 0.5°C temperature drop is sensed whereas the original S1 required a 1.0°C drop. In addition, a new factory set feature has been added to provide an offset between the group boiler temperature and the group head to account for differences. Consequently, temperature accuracy and stability is expected to be better on the Vivaldi II. As soon as tests on the Vivaldi II are completed they will be posted here. Back to TopWhere can I get a soft copy of the User's Manual? Back to Top
Late breaking news from LaSpaziale. I have the official recommended method for cleaning the S1 Vivaldi II group head. Did you ever wonder why you got that "barbecue grill" wire brush and the extra set of shower screens? LaSpaz didn't include the extra screens so you'd have an extra set. They are required with their recommended cleaning regimen which is targeted at light commercial use where there is no time for a complete backflush routine. The supposed reason for the double screen arrangement is to trap grounds between the screens so that the 3-way valve doesn't really need a detergent cleaning.
There you have it, straight from LaSpaziale. Frankly, I'm sticking with my backflush routine. Back to TopShould I buy the 15 Amp or the 20 Amp model? (applies to 115V models only) The good news it that they are physically the same unit with the following differences.
The S1 Vivaldi II supports three power modes:
When the S1 Vivaldi II is switched for 15A mode only the first two options are possible. It defaults to mode 2 on power up. Pressing the Boiler button puts it in mode 1. When the S1 Vivaldi II is switched for 20A mode all three options are possible. It defaults to mode 3 on power up. Pressing the Boiler button puts it in mode 1. Pressing the Econ button puts it in mode 2. Back to TopWhere can I find a 20A surge suppressor? The computer controller board in the S1 Vivaldi II costs several hundred dollars if it needs to be replaced due to a circumstance not covered under warranty. If you live in a lightning or power surge prone area, a surge suppressor is a good idea. Thanks to the prevalence of computers and consumer electronics you can find inexpensive ones almost anywhere that will work with the 15 amp version of the S1 Vivaldi II. HOWEVER, if you have a 20 amp S1 Vivaldi II model, finding a 20A surge suppressor with the NEMA 5-20 outlets is a challenge. I am getting drips into the drain pan when my Vivaldi is just sitting idle. Is this normal? Perform the adjustment procedure found here. For additional information contact one of the technicians at Chris Coffee Service. The bottom line is that even after the above adjustments are made, sometimes the valve drips and sometimes it doesn't. LaSpaziale says this is normal and expected for this design. I am having issues with my new Timer
These are the classic symptoms for those VII or VII Mini users that do not have the optional timer but have the timer enable switch set to ON on top of the black controller box. This switch MUST be set in the OFF position if you don't have a timer otherwise you will get the exact symptoms noted above. To access this switch you need to remove the top cup warmer tray. This is done by removing a single recessed screw in the front center of tray. Once the tray is removed, look inside the machine for two switches on top of a black box. This is on the right side when facing the front of the machine. One switch is marked 15/20 and is set to whether you are running in 15A or 20A mode. The other is labeled On/Off. If you do NOT have a timer this switch MUST be set to OFF! |