Page 1 of 2
Put Up Your Latte Art Pics!
Posted: Thu Jan 31, 2008 7:44 pm
by cruelbeanz
Don't have any yet - but someone please be the first - I would like to see what kind of talent resides here!

Posted: Fri Feb 15, 2008 3:03 pm
by Bushrod
I made this one last weekend. In one year with a Sylvia, I never even got this close!
(Yes, I realize it's not that good. I'm still working on it!)

Posted: Sat Feb 16, 2008 12:55 am
by Mizspresso
OK Bushrod, if you can post your early attempts I will post mine. This is the first thing I got that looked anything remotely resembling an intentional design. I have another, slightly better one on another computer. I will post that later.
Till then, here is my addition. So, now Bushrod, you can feel like a pro. Wonder if we have any really whiz bang latte artists here?
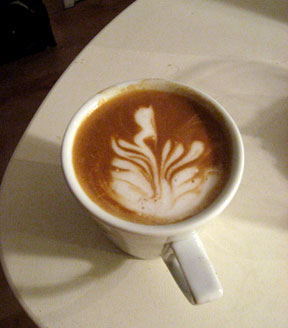
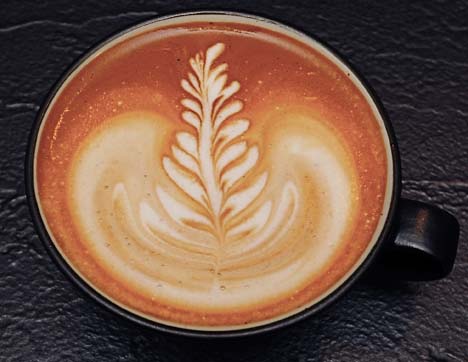
Got my Vivaldi in December. Made this in January. Could not do anything with the Barista!
Posted: Mon Feb 18, 2008 8:57 pm
by Ale
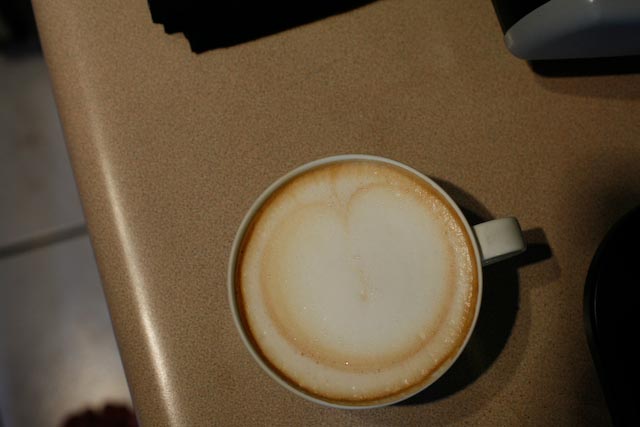
Not a perfect microfoam but I'm learning ...
Posted: Fri Feb 22, 2008 12:23 am
by Niko
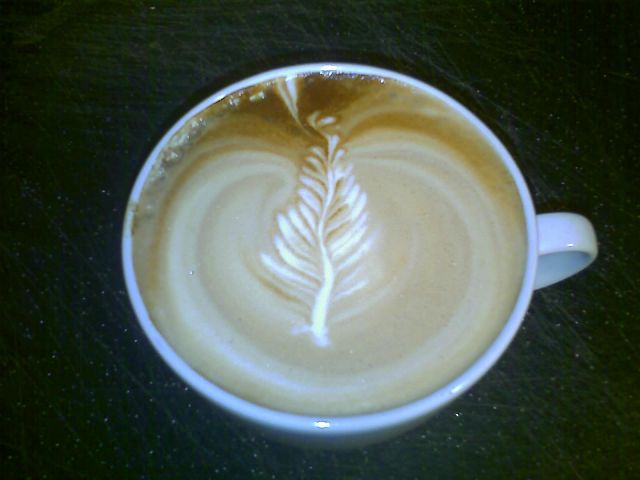
Here's a Cappa from the other night, sorry about the poor quality pic (from my phone). I remember the rosetta being crisper but I think it was shot after it already started to cottonball


I enjoy making Cappuccinos, they rarely get made in my household so it's exciting when a guest asks for one.
Posted: Sun Apr 20, 2008 9:09 pm
by JP
Two weeks with my new Spaz and I'm just starting to get the hang of it. :D Not that I was that good before, but it was a bit of a set back before advancing, learning to use the power and control of the Spaz. This board has helped me a lot, as well as being responsible for me spending more than I ever would have imagined I'd spend on an espresso machine in the first place.

But I love it.
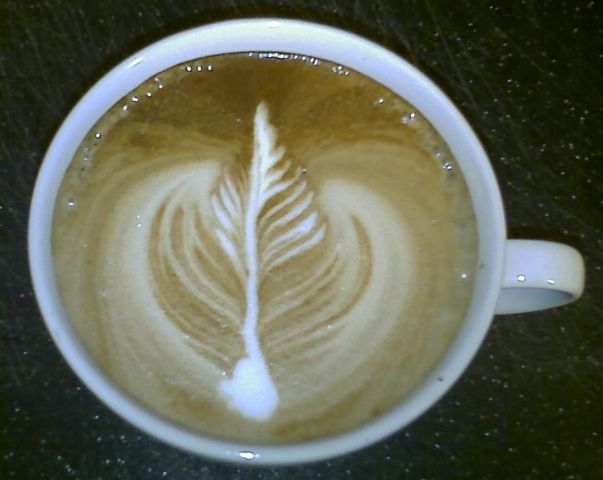
Only a couple of days ago did I reach the point where I can reasonably consistently pull a good shot and get good micro-foam too. Now I just need to keep practicing and pouring. These are a couple of my most recent, not perfect, but I'm proud of them

Having fun anyways, and love drinking the product.


Posted: Mon Apr 21, 2008 12:28 am
by zoey
Well now.....I would like to say to each and every one of you who posted a photo and to those of you who can pour art but have yet to take a photo............
BITE ME
I've been working on this art crap for about a year now and can't pour anything that looks like anything.

Two weeks ago I heard about a coffee shop in which they were experts at art. I drove the hour(+) to the place. Both an employee, who was all of 16 years old, and the owner of the shop showed me (step by step) how to do art.
The 16 year old was pouring absolutely stunning rosettes, hearts, triple rosettes....I was truly in awe. (OK, by "awe" I mean pissed-off).
I scurried home with my newfound knowledge and fired up the machine. A gallon of milk later, I was still pouring nothing that resembled nothing.
Posted: Mon Apr 21, 2008 6:06 am
by JP
Well I'm no expert or authority, I'm just learning myself, but I have found that 90% of it is in the prep.
If the milk isn't steamed just right nothing will work. Once you figure out how to froth the milk just right, it's like magic the art almost pours itself.
90% of my effort is in preparing the shot and milk just right, and as I say I just found that sweet spot a few days ago. Suddenly every cup I pour makes something. Now I just have to learn to master those somethings.
It's hard cuz I only get to make one cup a day, so if I don't get it right, I don't get to try again till tomorrow. That kid in the coffee shop probably gets to make a hundred cups a day, It'll take me nearly four months to get the practice he can get in a day.

I've been photographing each cup, good or bad, and can look back and really see my own progress, and I can see exactly the day I got my prep right.
Posted: Mon Apr 21, 2008 6:08 am
by hlsheppard
Here's a couple of my decent ones. I know the quality is lacking, but I just snap a pic of the better ones with my cell phone! :D
Posted: Mon Apr 21, 2008 1:45 pm
by zoey
Maybe I can con the kid into letting me behind the counter to try frothing a few myself.
My two issues:
I either end up with a bunch of foam on top, which just "plops" into the cup or I end up with decent foam but it's not even distributed. The last 1/4 of the milk poured into the cup has no foam at all.
Posted: Mon Apr 21, 2008 10:27 pm
by JP
If you haven't already, get yourself the .9 mm steam tip. I think I started getting great results the same day I put on the .9 tip.
I got the same thing your describing with the 1.2 mm tip I either got too much thick foam that would plop into the cup or too little that would separate from the milk. I think the .9 tip was the secret key that allowed me to start getting nice micro foam.
Posted: Mon Apr 21, 2008 10:38 pm
by JP
I feel like I'm on a roll.
I know this isn't the best, but it's my best. :D
Every cup I pour lately comes out better than my previous, I surprise myself each time.
I'm having fun, but few people I know want to hear about the coffee I made, much less see pictures of it.

Posted: Mon Apr 21, 2008 11:57 pm
by zoey
thanks for the tip JP. I feel like I'm fighting an uphill battle.
Posted: Tue Apr 22, 2008 2:38 pm
by Weska
I'm going to guess, zoey, that your two issues stem from not getting the microfoam right.
That "plop" is something that I call the "marshmallow" which is a chunk of coarser foam that has never been drawn into a full churning of all the milk in the pitcher. You may get a good eddying pattern around the edges of the pitcher, but that can be deceptive if the steam is not on strong enough and the tip placed properly to draw the center of the maelstrom down toward the bottom. Of course, when the marshmallow falls into the middle stage of your latte art, everything is disrupted.
If you are getting a stream of hot milk only at the end of pouring, then probably you have overheated it. Overheating in the end will deflate your microfoam and leave you with scalded milk. Any patterns will be weak and fail to spread across the surface of the coffee.
So your issues lead me to believe that you need to make some progress (and it may not need big changes, but just a tweak) in your use of the steam control and positioning of the tip and also in stopping before things get too hot.
Posted: Tue Apr 22, 2008 4:36 pm
by zoey
That explains exactly what is happening to me.

I tried storing the pitcher in the freezer and even put the milk in the freezer for 10 minutes before steaming. This seemed to help.
Do you think that the smaller aperture nozzle will help my cause or is it more a case of my poor technique?
Posted: Tue Apr 22, 2008 6:35 pm
by JohnB
Are you using whole milk or reduced fat?
Posted: Tue Apr 22, 2008 10:34 pm
by zoey
Whole milk.
I poured 4 drinks today.
Two were modern-era renditions of the Mona Lisa.
One was a delightful Hooded Merganzer (male) tending to a ground cover nest, which was highlighted by a gorgeous Jamaican-like sunset.
The last was a near perfect pour of a tiger lily being pollinated by a bumblebee.
Ok, not really. They all looked like crap.
Posted: Tue Apr 22, 2008 10:49 pm
by JP
What Weska describes is the very issue I was having. I experimented with my technique learning and tweaking a little each time. I was getting it pretty close but just couldn't get it right. I should say I'm steaming 4 Oz whole milk at a time, and I think the 1.2 mm tip was just too much for such a tiny Qty of milk. It just heated the milk up way too fast. I'm sure the 1.2 tip can work well for many people, and is a better choice for larger quantities of milk, but the .9 for me brought things under control and I'm getting great results every time now. I actually didn't want to put on the smaller tip, but now I think it was a key move.
Posted: Wed Apr 23, 2008 10:24 am
by JohnB
zoey wrote:
Ok, not really. They all looked like crap.
Switch to Americanos, much less stress.
Posted: Fri May 02, 2008 4:04 pm
by zoey
Here's my attempts at art.
I call this first one "Moon over Madagascar". As you can see, I've added subtle paleontological hints masterfully blended with renaissance period correct overtones.

My next masterpiece was inspired while sipping a lovely cup of espresso on the deck. I was looking out over the crimson colored lake as the sun rose through distant storm clouds. I looked down and noticed an unknown species of arachnid daintily making its way around a budding lilac.
I call it "Happy spider is going to the Mall of America to buy an umbrella".
[/img]
Posted: Fri May 02, 2008 5:03 pm
by Weska
All kidding aside, zoey, your playing with your patterns means that you are very much on the right track. If you didn't have workable microfoam, that wouldn't be possible. The "marshmallow" doesn't allow happy faces, does it?
And you did it twice in a row, which means that your consistency is decent.
You need only to practice the swinging and dribbling.
Disclaimer: to this day I cannot make a classical rosetta. I get a pretty good sprig or Christmas tree but never that rounder shape.
Posted: Fri May 02, 2008 7:57 pm
by zoey
A few days ago, before my machine kacked, I almost poured a rosetta. I was soooo close! I was ecstatic! I should have taken a photo of it.
Posted: Fri May 02, 2008 8:11 pm
by chefbear
Thanks for the laugh Zoey!
I think your latte art is special. Maybe you should just take a Pollock-esque approach to it and refuse to acknowledge the "mistake".
I would pay double to be handed a latte like your "Happy Spider" by one of the baristas at Espresso Vivace in Seattle!
Don't abandon your art. You have a flair.
Posted: Fri May 02, 2008 8:27 pm
by zoey
MISTAKE???!!! I wasn't kidding. This is serious art and I'm a professional.
I would compete at the SCAA this weekend but, well you know, it just wouldn't be fair to all the other people. Crushing dreams just isn't in my nature.
Man, I'm on a roll.

Homework is driving me batty. Only 9 more days of nursing garbage before I'm done.
Posted: Wed May 21, 2008 1:19 pm
by zoey
Now that finals are over, I just don't have the mental wherewithal to come up with some insightful and emotion provoking names for the following debauchery, which I'm deeming as being latte art. :(
Either way, I've been practicing about every day and can only seem to get THIS close to actually making something. I'm about to give up.
Posted: Wed May 21, 2008 6:33 pm
by Mizspresso
zoey wrote:I've been practicing about every day and can only seem to get THIS close to actually making something. I'm about to give up.
I feel your pain. For awhile, I was making some progress. I will start to get some decent controlled design, but just about then I run out of cup!
Something that helped me out was to view a video put out by David Schomer. A friend loaned me a copy of it. Just after watching it, I was actually starting to do it, but it's hard to find that body knowledge and hold onto it.
He recommends holding the cup up at an angle, start to pour under the coffee from the lip nearest the pitcher, then move the pitcher to the backside of the cup. As he does it the rosette just seems to flow into the back lip and up around the sides of the cup. The flow seems to drive it as much if not more than the hand movement.
I also find that I like my foam thicker than is what is premium for latte art. I like cappuccinos and like that thick cap on top (NOT marshmallow, just thick).
Anyway, I am on hiatus from trying this art stuff. Probably because my results have been so pitiful.
Have you done the YouTube tour of this stuff?
Posted: Wed May 21, 2008 11:27 pm
by zoey
I've been a YouTube fool.
Currently, I have a 32oz frothing pitcher. I'm thinking that I might have better control with a 20oz. The wand is just a smudge too short and the size of the pitcher makes handling difficult.
I'm also considering buying the smaller hole aperture steam wand tip.
I went back to the coffee shop, which employs the 16-year-old brat who was pouring me perfect rosettes. I'm no better after a second round of lessons.
Posted: Wed May 21, 2008 11:39 pm
by JP
For a little while there I was on a streak, I kept pouring better and better, thinking each time I can't do any better than that.
But then it came to an end, I seemed to peak with this one. I did an OK one after this and then I lost it, I fell apart and couldn't pour anything all of a sudden.
I've clawed my way back and I'm pouring pretty decent looking cups now but nothing great.
Posted: Thu May 22, 2008 2:06 am
by Mizspresso
zoey, try a 12oz pitcher. I get my best results with the smaller size. They use little ones at Barefoot Roasters. With the larger size I have to use too much milk to get decent results.
And if you haven't ordered the smaller tip, do that now.
Re: Put Up Your Latte Art Pics!
Posted: Sun Jun 15, 2008 12:39 pm
by zoey
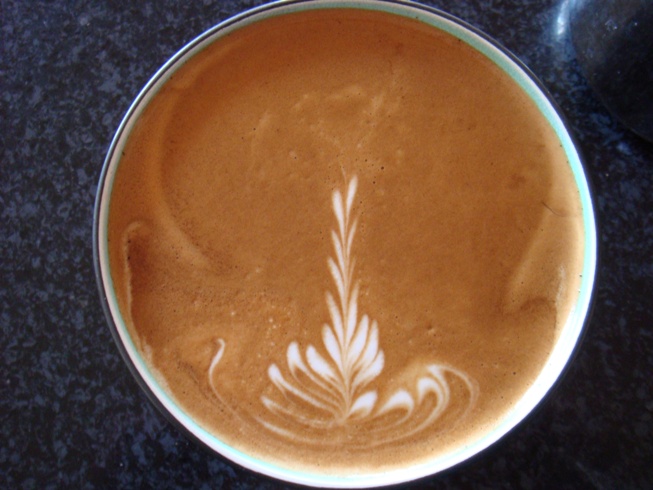
I seem to be stuck making Christmas tree-esque art. I can't progress any further than this. I'm about to give up.
I see that with the new software I have to resize photos before I upload them.

Visual picture for you: There is a black granite counter top with a 16oz latte cup sitting upon it. Within the cup is something that poorly represents latte art. There is evidence of a nice micro foam with a lovely, thick crema. The micro foam appears to be something that resembles a 5 year-old's drawing of a white Christmas tree.
Re: Put Up Your Latte Art Pics!
Posted: Sun Jun 15, 2008 12:59 pm
by zoey
OK, I had to find a program to resize the photos. Let's try this:
Re: Put Up Your Latte Art Pics!
Posted: Sun Jun 15, 2008 2:15 pm
by Niko
That's an improvement since last time, zoey.

You're getting the motions now, if you work on the milk steaming a little more by getting a little less foam you'll get some better media to work with as well.
Keep up the hard work, it isn't easy...
Re: Put Up Your Latte Art Pics!
Posted: Sun Jun 15, 2008 3:00 pm
by chas
zoey wrote:OK, I had to find a program to resize the photos. Let's try this:
Hmmm. I've uploaded some photos and didn't have to resize. Let me check into this. Perhaps the ones I picked had already been shrunk somewhat. I'm still trying to figure out exactly what all the options in this new forum do and what is optimum for our purposes versus the amount of storage I have available.
Re: Put Up Your Latte Art Pics!
Posted: Sun Jun 15, 2008 8:41 pm
by zoey
NIKO: Should I be plunging the steam tip sooner then?
Re: Put Up Your Latte Art Pics!
Posted: Wed Jun 18, 2008 7:19 pm
by Niko
Absolutely.
A good way to get this done is the ditch the thermometer (if you're using one)
Do it by feel...as soon as you feel the pitcher getting just a tad over room temp - sink that steam tip and roll that milk for until it just starts to burn you before cutting off the flow.
Re: Put Up Your Latte Art Pics!
Posted: Thu Jun 19, 2008 12:28 am
by zoey
I'm only adding what I perceive to be a small amount of air during the first 8 seconds or so before I plunge the wand. I do use a thermometer and I cut the steam at about 135F.
It just seems that I can't get the milk to spread a wide to narrow pattern without moving my wrist in a wide to narrow pattern (if that makes sense). Hope I can explain this:
when I watched the 16yo twit pour a rosette at the coffee shop, she started pouring the milk at the edge of the cup closest to her. The pitcher was pretty high in relation to the cup. As the level of milk decreased in the pitcher she started moving her pour towards the far end of the cup and she brought the pitcher closer to the surface of the coffee (~1-2").
Then, while continuing the pour, it appeared as if the milk started 'coming up' through the coffee. It was at this point that she started the fine and fast wrist movements. Each petal of the rosette became progressively smaller (less wide) but, it didn't appear as if her wrist movements had changed at all. While making the wrist movements, she slowly moved the pour towards the near end of the cup. At the point in which the pitcher was nearly empty, she 'pulled' back through the rosette.
I hope this made sense. I've been trying in vain to replicate this process.
If it weren't for the froth in the bottom of the pitcher, I wouldn't be able to make a design at all. This makes me wonder if there isn't enough free-floating bubbles within the milk to begin with??
Re: Put Up Your Latte Art Pics!
Posted: Thu Jun 19, 2008 3:47 pm
by Weska
Zoey, how much increase in volume is the foaming process adding to your milk?
I'm suspecting that you are under-steaming and getting only a very thin layer of very fine froth on top of your milk. You should look for the volume to increase by 50% or so to get a nice pourable microfoam.
Less than that will be mostly steamed milk with a very small quantity of runny foam only at the end of the pour. (I get this all the time when I'm not paying enough attention.)
More than that increase in volume will gradually become too stiff to work easily with poured latte are, although adequate for etched designs. Beyond 50% is probably partly a matter of individual preference, but doubling the volume (the standard of some years ago) is definitely going to give you a pretty rigid foam cap rather than a workable foam that mixes to make a design.
Re: Put Up Your Latte Art Pics!
Posted: Thu Jun 19, 2008 6:29 pm
by chas
It also seems that perhaps you are pouring too slowly. If you are pouring fast enough, you get the coffee swirling which would at least give you curved rather than straight "Christmas Tree branches" ;>
Re: Put Up Your Latte Art Pics!
Posted: Fri Jun 20, 2008 12:30 am
by zoey
Weska wrote:Zoey, how much increase in volume is the foaming process adding to your milk?
Well, I would estimate it to be less than 50%. I'll pull another drink in the morning and measure it visually.
Less than that will be mostly steamed milk with a very small quantity of runny foam only at the end of the pour.
Exactly! Basically, that's what I'm using to produce my sorry excuse art. There is no hint of the beginnings of a rosette forming. I'm just tossing thin foam back and forth.
It also seems that perhaps you are pouring too slowly.
You might have nailed it on the head. I do pour rather slowly. But then again, I watched the brat pour hers pretty slow.
CLARIFICATION: I should state that I am extremely jealous of the "brat". She's not really a brat at all. Actually, she's a very kind hearted, eclectic, young lady. She's spent time with me trying to help me through my latte pain and I appreciate her help immensely. As I age (and not so gracefully might I add), I find myself calling a lot of 20-year-olds "kids". In fact, I sit in my college classes and think to myself; "any one of these 'kids' are young enough to be one of my 'kids'".
Anyway, I digress. Back to the steaming thing. I find if I steam longer, I end up with a marshmallow plop as soon as I start pouring. So, based upon what you've said, I'm guessing that I need to find the fine-line between under-foaming and over-foaming??
Re: Put Up Your Latte Art Pics!
Posted: Fri Jun 20, 2008 2:46 pm
by Weska
Maybe not so much the fine line between under- and over-foaming as the position of the tip--including depth, placement, and angle--that will in your particular pitcher (and just about any pitcher has such a sweet spot) will create a churning top to bottom.
Once you have that, how long you let it proceed while very gradually raising the nozzle let's you control what proportion of (nicely mixed and nearly uniform) foam you are generating. But you've got to find the sweet spot before you can control the nature of your foam.
How to describe it?
You will feel as you hold the pitcher in the sweet spot that there is a sort of vibrating but smooth turbulence throughout, as if a genie is squirming inside a magic lantern.
You will see the surface of the milk form a deep dimple in front of the nozzle where the steam stream is drawing the milk downward and a corresponding hump behind the nozzle where this vertical eddy or whirlpool that you are trying to create comes back toward the surface (only to be sucked down again, which is how the foam gets to be so uniform).
Keep with it. I think you must be really close.
Re: Put Up Your Latte Art Pics!
Posted: Sat Jul 05, 2008 1:30 pm
by Jake
Well, it looks somewhat like it is supposed to. But it tasted better than it looks.
Jake
Re: Put Up Your Latte Art Pics!
Posted: Fri Jul 11, 2008 1:13 pm
by zoey
I was soooo close with this one!
I went back to Black Sheep Coffee (BSC) and talked at length to another kid who could pour art. We came to the conclusion that my 32oz frothing pitcher was WAY to big. I couldn't believe it when he handed me one of their 20oz pitchers and said "Take this home and give it a try."
A few minutes later the owner appeared and we started chatting about what I was doing wrong. Apparently, he has ordered a Synesso single for training purposes. Anyway, he's invited me to come and learn how to do art!
The smaller pitcher made a huge difference. It seems like the Mini just doesn't have the guts to get a great swirl in the milk though. Maybe it's because I haven't swapped to the 20A yet?
According to the owner of BSC, I should be running at about 1.5 bar. I see that my machine only runs at about 1.35 and it starts to putter out while stretching milk.
Well, at least I'm on the right track!
- resized.JPG (97.22 KiB) Viewed 90971 times
Re: Put Up Your Latte Art Pics!
Posted: Fri Jul 11, 2008 1:28 pm
by Bushrod
I use a 16 oz pitcher for 12 oz drinks and a 12 oz pitcher for 6 oz drinks.
Got the 16 oz Motta for Father's Day/ Works so well that I got a 12 oz one to match!
Re: Put Up Your Latte Art Pics!
Posted: Fri Jul 11, 2008 4:47 pm
by zoey
If I haven't said, I've got a 20oz on order. I think a 16oz might even be better!
I would really like to try out the "old", larger wand tip (Mini's came with the smaller tip).
I've found that the stock wand is still a little too short for the 20oz pitcher. I may end up ordering the longer one. Anyone know if they make the longer wand in the 'no-burn' style?
Re: Put Up Your Latte Art Pics!
Posted: Fri Jul 11, 2008 10:25 pm
by Niko
The Vivaldis do run at 1.5 bar - they max out in that range. The 1.35 bar you mention sounds right, you don't really need more than 1.1 bar to get good milk, sure 1.5 is great when you run a bucket under it but most of us don't pipe in Synessos at home.
The 32oz pitcher is an ABSOLUTE MONOLITH! I'm surprised the Mini V didn't run crying to mommy when you entered the room with it
The 20oz pitcher is nice, still not ideal for that stubby little steam arm - you NEED the S5 arm get into some serious business
Re: Put Up Your Latte Art Pics!
Posted: Fri Jul 11, 2008 11:41 pm
by zoey
I was watching their milk whirl around (actually more like "hurricane-flush a 6 gallon toilet" whirl) and could see that it made quite a difference.
I'm just wondering if upping to the 20A service would make any difference in frothing power? Like I said, about 1/2 way through the stretching process, the pressure drops off significantly.
Hey Niko: is this the wand you are talking about:
http://www.chriscoffee.com/products/hom ... s5steamarm
Re: Put Up Your Latte Art Pics!
Posted: Sat Jul 12, 2008 9:44 am
by chas
That's the link to the longer arm. This is the link to the No Burn arm:
http://www.chriscoffee.com/products/hom ... /noburnarm
A number of us have tried both and most have gravitated back to the longer arm or should I say the longer "burn arm" since both are longer than the stock arm.
The No Burn arm has two problems from my point of view. 1) The two bends are far less than 90 degrees which means it's hard to get close to a straight up and down entry into the pitcher. 2) It comes with a special 2 hole tip that prevents the heat in the tip from conducting to the arm. That doesn't provide enough steam power for other than small pitchers of milk. Your 4 hole tip will fit and produce great steam but then the no burn feature goes away since it lacks that tip insulating feature.
Exploded diagrams of both arms are shown here:
http://www.rimpo.org/s1v2/images/SteamArmAssy.pdf
The top right arm in the first drawing is actually the original S1 arm that received universal customer complaints. Chris replaced that on new machines and provide free upgrades for all S1 customer about 6 month after the S1 was launched.
You can see that the no burn arm is the arm from the Quick Mill. These diagrams are especially useful when reassembling in case you forget which washer goes where or for future reference if you need to order a replacement washer.
Re: Put Up Your Latte Art Pics!
Posted: Sat Jul 12, 2008 12:45 pm
by zoey
Thanks Chas! Sounds like I will be getting the burn-your-fingers wand
Re: Put Up Your Latte Art Pics!
Posted: Sat Jul 12, 2008 4:49 pm
by Niko
zoey wrote:
I'm just wondering if upping to the 20A service would make any difference in frothing power? Like I said, about 1/2 way through the stretching process, the pressure drops off significantly.
IT WILL MAKE ALL THE DIFFERENCE IN THE ENTIRE GALAXY.
...to say the least.
The S1 is an "S-Half" in 15A mode
The machine is a single boiler (IMHO) in that mode
I've had to run it in 15A for a while which is perfectly fine if you only make espresso, which I do 90% of the time nowadays. If you make Cappas and especially Lattes, that extra juice will sure come in handy.
Re: Put Up Your Latte Art Pics!
Posted: Sat Jul 12, 2008 5:19 pm
by JohnB
My S1V2 always cuts off at 1.35 bar not 1.5b. Seems to do a good job of steaming particularly if I wake it up first with a quick flush so the heater kicks in. Whats involved in raising the steam pressure to "red line" (1.5b)? What is all that knocking noise you hear when you drain 3+ cups out of the boiler & the heater kicks in?
Re: Put Up Your Latte Art Pics!
Posted: Sat Jul 12, 2008 8:52 pm
by zoey
Well, I've noticed that even after heating up all day, the machine will drop to less than 1.0 bar when steaming. I'm pretty sure that I can blow my nose harder than that.
It steams fairly well until the milk gets to about 32-38 degrees Celsius. Then it really putters out big time.
My guess is that all of the knocking noises are from bubbles being produced. I wonder what pressures the boiler can safely take for extended periods of time. I'm assuming that it's at 1.35 bar as a safety margin.
Hey Chas: Should I take this to a new thread since, technically, this is a post for latte art? I feel like I've hijacked this thread.
Re: Put Up Your Latte Art Pics!
Posted: Sat Jul 12, 2008 9:08 pm
by chas
If you turn on the steam before a shot to blast out the condensation, doesn't the boiler turn on and build the pressure build up?
With half the boiler size and the same heater element I'm surprised that you don't have steam out the ying yang.
Re: Put Up Your Latte Art Pics!
Posted: Sun Jul 13, 2008 2:19 am
by zoey
chas wrote:If you turn on the steam before a shot to blast out the condensation, doesn't the boiler turn on and build the pressure build up?
Yes, the boiler does kick on and it brings the pressure right back up to where it should be. But, it's only a brief time in which the valve is open. Once the valve is open for an "extended" period of time (when steaming milk), the pressure falls dramatically.
Could it be that the boiler is overfilling, hence not allowing enough room for expansion? Just guessing here. Or, once again, is 15A too weak to effectively recover during the time that the valve is open, which allows the pressure drop? (Niko says "yes").
Re: Put Up Your Latte Art Pics!
Posted: Sun Jul 13, 2008 10:25 am
by chas
zoey wrote:chas wrote:If you turn on the steam before a shot to blast out the condensation, doesn't the boiler turn on and build the pressure build up?
Yes, the boiler does kick on and it brings the pressure right back up to where it should be. But, it's only a brief time in which the valve is open. Once the valve is open for an "extended" period of time (when steaming milk), the pressure falls dramatically.
Could it be that the boiler is overfilling, hence not allowing enough room for expansion? Just guessing here. Or, once again, is 15A too weak to effectively recover during the time that the valve is open, which allows the pressure drop? (Niko says "yes").
Good point. We keep thinking about the upside to having the same heater element heating up 1/2 the qty of water. I suppose another possibility is that when cold water flows in, it's going to have an much more significant cooling effect than would be the case in the larger VII boiler. If that's the cause of what you are seeing I would think all Mini users would be having the same complaint - unless of course your Minnesota tap water is the temperature of glacier melt!
I would think 15A mode would only impact what you are seeing if the Steam boiler doesn't cycle during steaming when you need it because the group boiler is on. When you see the weak steam happening if the group temp LED is flashing when you need the boiler light to be flashing, you need to get that rascal in 20A mode.
Re: Put Up Your Latte Art Pics!
Posted: Sun Jul 13, 2008 1:04 pm
by zoey
if the group temp LED is flashing when you need the boiler light to be flashing, you need to get that rascal in 20A mode.
You know, I haven't even look at it. My attention is completely focused upon the milk. I'll look at it today and report back.
Are there many Mini owners here (that post frequently)? Seems like I haven't seen any posts by them in a while.
Re: Put Up Your Latte Art Pics!
Posted: Tue Jul 15, 2008 12:04 am
by zoey
OK, I checked and the boiler light flashes while steaming. I also noticed that the pressure drops to about 0.5 bar before I finish steaming about 236mL (8oz) of moo juice.
Re: Put Up Your Latte Art Pics!
Posted: Tue Jul 15, 2008 1:21 pm
by zoey
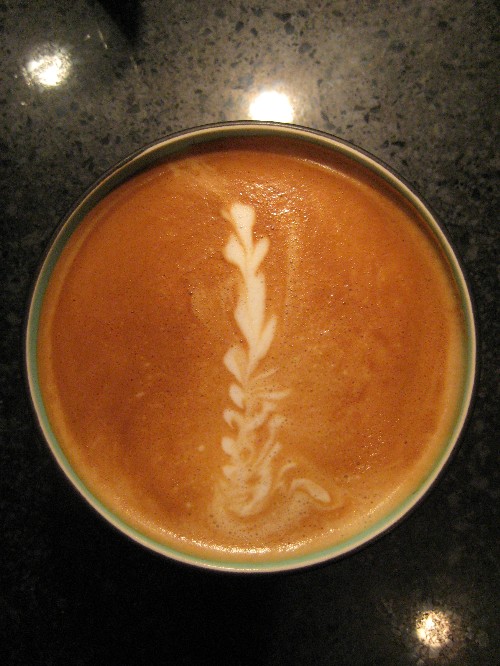
I am getting sooo close! What am I doing wrong??

- resize 2.JPG (54.99 KiB) Viewed 90818 times
Re: Put Up Your Latte Art Pics!
Posted: Tue Jul 15, 2008 1:36 pm
by chas
That depends. If you were going for a fern, you're there!
Re: Put Up Your Latte Art Pics!
Posted: Tue Jul 15, 2008 10:52 pm
by zoey
Yea, I didn't mean a 'rosette'.....I meant to say 'fern'.
I was actually looking for advice on how to pour a 'variegated fern'. Yea, that's the ticket...variegated fern....
After class tonight I returned the 20z pitcher that Black Sheep Coffee loaned me. They were kind enough to let me make my own drink. Let me tell you, that Synesco machine is insane. You could steam clean your driveway with the pressure it exerts.
Anyway, my first one was a total flop. After I got some further instructions from another person, I finally poured a rosette!! It wasn't perfect, but at least it looked like one. I was stoked!!
This weekend I'm going to take a break from studying for finals and install 20A in the kitchen. I hope this is the problem. If not, I'm going to be an unhappy camper.
Re: Put Up Your Latte Art Pics!
Posted: Wed Jul 16, 2008 7:42 am
by chas
SO what was the trick you were missing?
Re: Put Up Your Latte Art Pics!
Posted: Wed Jul 16, 2008 11:30 am
by zoey
Honestly, I think it's the lack of power that my machine is suffering.
I watched one of the baristas steam milk for a 12oz cappa. He finished steaming and sat the pitcher on the counter for 3-4 minutes. I thought to myself "It's going to be flat".
He picks up the pitcher, gives it a few squirrels, and proceeds to pour a double rosette.
Re: Put Up Your Latte Art Pics!
Posted: Sat Oct 18, 2008 1:34 pm
by Gabelstaplerfahrer
- squirrels.jpg (17.31 KiB) Viewed 90448 times
Just kidding.
From what I understand, it isn't hard to upgrade from 15 to 20 amps, just flip a switch and change your plug and wall socket. Or am I wrong here?
Re: Put Up Your Latte Art Pics!
Posted: Sat Oct 18, 2008 3:19 pm
by chas
True. Many times in newer houses the kitchen has 20A circuits already but with 15A plugs. If you can convince yourself there is little or no current draw on any other 15A plugs on the same circuit, you can probably get away with just flipping the S1 switch to 20A.
Re: Put Up Your Latte Art Pics!
Posted: Mon Oct 20, 2008 5:26 pm
by zoey
Squirrels
Looks like I need to actually read what I type
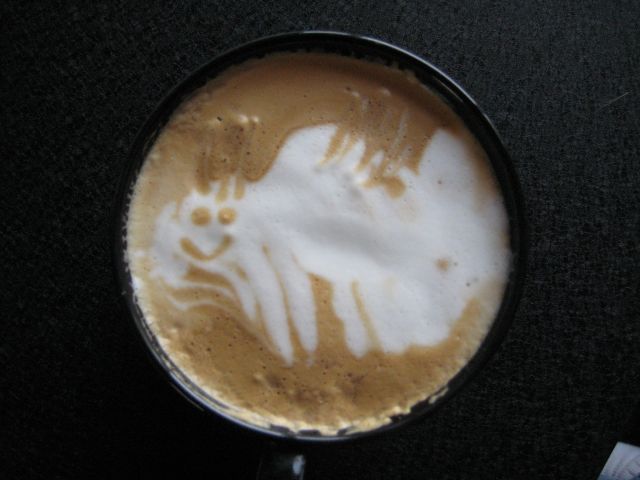
I'm still working on pouring something decent. Here's the latest attempts
Re: Put Up Your Latte Art Pics!
Posted: Mon Oct 20, 2008 5:33 pm
by zoey
More goofing around. When an onion goes bad, make a cat.
Re: Put Up Your Latte Art Pics!
Posted: Mon Oct 20, 2008 5:35 pm
by zoey
Last ones[attachment]03.jpg[/attachment]
Re: Put Up Your Latte Art Pics!
Posted: Thu Oct 23, 2008 1:43 pm
by Weska
Zoey, I think you have arrived!
Those last two are pretty near the zone. Nice progress!
I've gotten some results fairly close to yours only very recently, and it looks as if you are out in front of me. My breakthrough came from watching the Scott Rao video. (It's on YouTube and home-barista.)
Panting in pursuit...
Re: Put Up Your Latte Art Pics!
Posted: Thu Oct 23, 2008 1:45 pm
by Weska
The cat is brilliant too, although I'm not used to cats with mohawks.
Re: Put Up Your Latte Art Pics!
Posted: Fri Oct 24, 2008 1:10 pm
by zoey
Around our house, just about anything goes; as evidenced by one of our retarded (but extremely lovable) cats
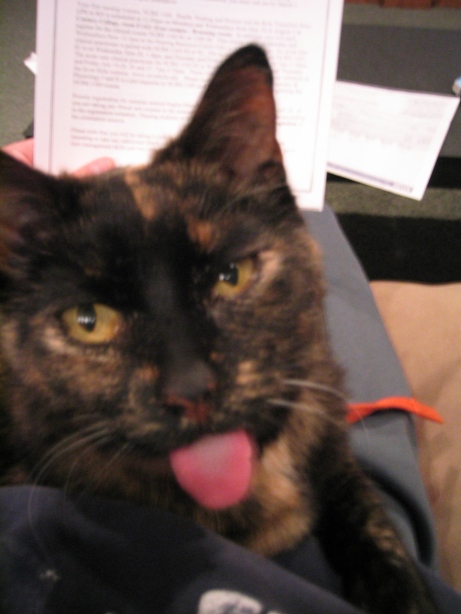
- 117_1722.jpg (107.75 KiB) Viewed 90328 times
Re: Put Up Your Latte Art Pics!
Posted: Mon Oct 27, 2008 12:57 am
by Niko
Well just for that I'm going to try and pour a rabbit in my Cappa this week...
Re: Put Up Your Latte Art Pics!
Posted: Mon Oct 27, 2008 12:06 pm
by zoey
Re: Put Up Your Latte Art Pics!
Posted: Mon Oct 27, 2008 2:25 pm
by Niko
Here's this morning...
Re: Put Up Your Latte Art Pics!
Posted: Mon Oct 27, 2008 3:57 pm
by chas
We hate you!

Re: Put Up Your Latte Art Pics!
Posted: Tue Oct 28, 2008 2:00 pm
by zoey
Yes, we do
Re: Put Up Your Latte Art Pics!
Posted: Tue Oct 28, 2008 4:46 pm
by Niko
You're stuff's come a long way, Mr. Zoey
I think you have good hand movements and you certainly know how to pour, looks like the milk isn't cooperating with you. I mean to say if you had better paint - the artist is definitely waiting there. Without getting technical I'd say a little less foam and more steam in the milk and you'll have competition style rosetttas in no time

Funny thing is that my Rosettas got better when I stopped making Cappas

I'm a little confused since I used to make Cappas everyday for ages, pour after pour and gallon after gallon of milk I was doing it in my sleep. I guess I'm more relaxed now to care about what the milk looks like

My wife and I only drink espresso, she occasionally asks for a Macchiato but it's rare I get to crank open that steam arm these days
The other morning she asked, "may I have a Cappa?"...that's the picture you see up above, I haven't made a single milk based drink in about 2 months.
Re: Put Up Your Latte Art Pics!
Posted: Tue Oct 28, 2008 7:54 pm
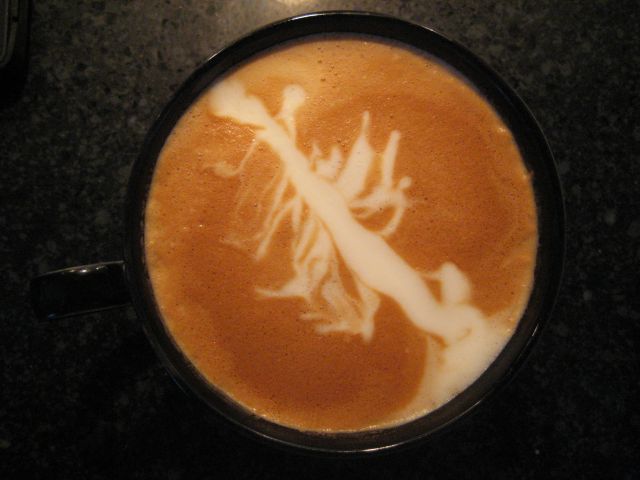
by zoey
I've been making a single change in my process and trying it out for a few days. If it doesn't make a difference (or things get worse), I make another change.
I, too, think that I'm having an issue with frothing. I've tried 'sucking' in less air, shortening my frothing times, putting the pitcher in the freezer, in the refrigerator, in ambient air.....using more/less milk, trying different milk brands, combining 2% with 1% and/or skim.....
I've tried starting the rosette at the edge of the cup; in the middle, from the leading edge......
I've tried using more/less espresso in the cup.....
I also think that I need to slow down my hand movements to allow a little more space between the leaves.
Here's this mornings attempt
- DSC00353.jpg (119.65 KiB) Viewed 90168 times
Re: Put Up Your Latte Art Pics!
Posted: Tue Oct 28, 2008 8:15 pm
by Niko
That's your best one to date!!!!!!!!
Only thing I'd change is where you start that pour in the cup, other than that it's perfect.
I moved it in your cup a bit to show you

Re: Put Up Your Latte Art Pics!
Posted: Wed Oct 29, 2008 12:07 am
by zoey
I went back to slowing my wrist motion down, but I think I sped up half way through. I also think my timing (when to start the rosette) is a little off.
I seem to be having trouble getting the first few to spread out nicely. Any tips?
Is there an optimal percentage of milk to coffee ratio for pouring art?
I did discover that slowing down the initial pour (to mix the milk in with the coffee), and then pouring much faster when starting the art, made a huge difference.
I ordered the longer wand and hope that it will help. I normally steam about 225cc's of milk and the OEM wand is almost too short.
I've been adding air to the milk until it reaches about 60F and then sinking the wand just a few mm until the sucking sound stops. This seems to be producing too much foam, so when the milk reaches about 100F, I sink the wand to the bottom of the pitcher. It still doesn't seem right to produce a paint consistency.
In that last photo, I started the rosette closer to the edge of the cup in hopes of helping it to spread out. Looks like I just end up with a shorter rosette. Although, had I not sped up half way through, it might have filled more of the cup. Now I'm just rambling.
Re: Put Up Your Latte Art Pics!
Posted: Wed Oct 29, 2008 10:47 am
by Niko
zoey wrote:
I seem to be having trouble getting the first few to spread out nicely. Any tips?
That has to do with the velocity of the pour, the faster it hits the cup and mixes in with the coffee - the more waves it will create throwing a bigger leaf pattern to spread out into the cup.
The longer steam arm will help you break those larger bubbles, especially when you'll be able to sink the tip even further down into the pitchers. You'll get a nice rolling action that'll blend the foam better.
I don't even worry about what temp the milk is before sinking in the milk further, just go by feel - as soon as the temp starts to feel slightly luke-warm then plunge away. I freeze all the pitchers, a whole rack is dedicated to them
Re: Put Up Your Latte Art Pics!
Posted: Wed Oct 29, 2008 11:28 am
by zoey
Thanks! I'll try pouring even faster when starting the rosetta. Hopefully the wand will be here today. I also have a timer coming.
Re: Put Up Your Latte Art Pics!
Posted: Mon Nov 03, 2008 11:39 pm
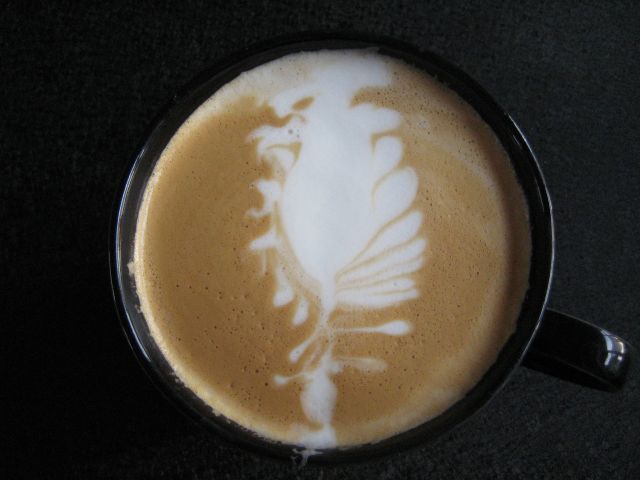
by zoey
Another one. Working on slowing down the wiggle.

- DSC00356.jpg (79.79 KiB) Viewed 90034 times
Re: Put Up Your Latte Art Pics!
Posted: Wed Nov 05, 2008 3:25 pm
by Niko
Nice!!
Take a look at your early posts to see where you came from and where you have arrived.
Really nice to see the whole journey!
Re: Put Up Your Latte Art Pics!
Posted: Fri Nov 14, 2008 8:37 pm
by TruthBrew
Here's one from a while back poured into a tall paper "To Go" cup...
Re: Put Up Your Latte Art Pics!
Posted: Sat Nov 15, 2008 11:11 am
by zoey
So, the shape of the cup in no way helps to create the art? I bought sauce dipping bowls and use them as my coffee cups. I was thinking that the concave shape of the bottom of the bowl would help produce better art.
Re: Put Up Your Latte Art Pics!
Posted: Sat Nov 15, 2008 12:55 pm
by Niko
I also thought the shape of a cup makes a difference.
I don't thinks so since my pours look the same in anything I pour into.
Here's an ACF cup......
Re: Put Up Your Latte Art Pics!
Posted: Sat Nov 15, 2008 5:31 pm
by zoey
Now that's the kind of art I am striving to pour!
Re: Put Up Your Latte Art Pics!
Posted: Sat Nov 15, 2008 9:02 pm
by Niko
You're already there, Zoey.
I'm still waiting for the original poster of this thread to upload a pic of his art
Re: Put Up Your Latte Art Pics!
Posted: Fri Nov 21, 2008 5:15 pm
by TruthBrew
zoey wrote:So, the shape of the cup in no way helps to create the art? I bought sauce dipping bowls and use them as my coffee cups. I was thinking that the concave shape of the bottom of the bowl would help produce better art.
I'm no pro, but I don't find that it matters much on the shape of the container, like Niko I can do the same patterns into nearly any vessel. The depth of a mug/cup certainly makes it a bit harder to get right.
Re: Put Up Your Latte Art Pics!
Posted: Sun Nov 23, 2008 12:41 am
by zoey
Just for giggles, I'll have to try out some different cups.
Sure would look pretty in a martini glass

Re: Put Up Your Latte Art Pics!
Posted: Sun Nov 23, 2008 1:59 am
by Niko
I'll be waiting for that one!
Now I'll have to pour one in something creative

I have some time since the next Cappa won't be for another week or two.
Re: Put Up Your Latte Art Pics!
Posted: Sun Nov 23, 2008 4:41 pm
by zoey
I've been using some really neat dipping bowls that I picked up at Target. They have a little Asian appearance to them, with a charcoal color on the outside and a light blue color inside.
I looked through 40 pages (88 pages in total) of bowls but couldn't find them. This is close:
http://www.target.com/Reactive-Set-4-Bo ... wl&page=11
The inside of the bowls looks like this, but without the brownish rim:
http://www.target.com/Galaxy-Bowl-Set-6 ... axy&page=2
Re: Put Up Your Latte Art Pics!
Posted: Sun Nov 23, 2008 9:35 pm
by Niko
Nice!

Re: Put Up Your Latte Art Pics!
Posted: Sat Dec 13, 2008 8:37 pm
by Niko
Someone finally asked for a Macchiato.
...so my wife pulls out these little unusual cups.
We need to start posting more art in "different" vessels
Re: Put Up Your Latte Art Pics!
Posted: Sat Dec 13, 2008 9:53 pm
by BrewHaHa
Have you seen James Hoffman's
"Absurd Latte Art Challenge"from last year?
(Don't miss the pics posted in the comments!)
Here's one example:

- LatteCash.JPG (39.52 KiB) Viewed 89705 times
Re: Put Up Your Latte Art Pics!
Posted: Sun Dec 14, 2008 1:36 am
by Niko
OMG!
Gotta' try that portafilter pour!

And I thought it was bad enough pouring one in a macchiato

Re: Put Up Your Latte Art Pics!
Posted: Sun Dec 14, 2008 1:19 pm
by zoey
The mouth pour guy has to have a mouth of steel
Re: Put Up Your Latte Art Pics!
Posted: Fri Jan 02, 2009 12:59 am
by zoey
I was going to video tape this pour, but I thought to myself "naw, I'm sure I'll mess it up". Now I wish I had.

- IMG_1311.jpg (141.29 KiB) Viewed 89414 times
Re: Put Up Your Latte Art Pics!
Posted: Mon Feb 23, 2009 9:26 am
by sakurama
I think this thread should be renamed Zoey's learning curve. It's actually been really instructive and seeing Zoey go from latte tart to latte art was encouraging. I'm still trying to figure it out but I think breaking up the crema first seems to help. I see the guys at my favorite place do that: pour in a little milk and swirl the cup and then go for it. I'll put something up once I've had a bit more practice...
Re: Put Up Your Latte Art Pics!
Posted: Sun Mar 01, 2009 2:32 pm
by zoey
Recently I have fallen into a rut. I can't pour a darn thing! Honestly, I think it might be due to the fact that my wife started purchasing cheaper milk. I'll have to get a gallon of the 'old' stuff and try again.
Re: Put Up Your Latte Art Pics!
Posted: Mon Mar 02, 2009 8:38 pm
by roknee
ok so heres two recent efforts. one in a cap cup and one in a small 'bowl' that i sometimes use for something resembling a piccolo latte
cheers
aaron