Dropping brew pressure while pulling a shot
-
mgwolf
Dropping brew pressure while pulling a shot
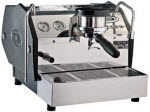
Just noticed this on my Mini. The brew pressure is about 9.5 or so at the beginning of the shot and gradually decreases throughout the course of the shot, to about 8.5 at the end. It stays at 9.5 during a blank. This is assuming a nice shot (25-30 sec, no channeling, etc.). Does this happen to everyone? I had an Anita before and don't remember the brew pressure dropping like this. Interested in your observations. Thanks. Michael
-
Niko
Not sure about this one, Michael.
Maybe some other Mini owners will chime in but I was thinking it has something to do with the vibe pump operating in a different manner compared to the rotary.
I also had an Anita which didn't drop in pressure during a shot but that machine is totally different since it had an E61 with the pre-infusion.
Who knows...
I'm all ears on this one with you.
-
caf4brains
My Mini's pump pressue stays steady throughout the shot...UNLESS....I've done a poor job of distruibution (my excuse is that it's still dark outside and my aging eyes can't handle the darkness) or I've overdosed the PF. Then I get a rapidly oscillating pressure. To add insult to injury the gauge/pump makes a little rattling noise that I guiltily interpret as a raspberry. I'm workin' on it!!
-
ebohling
-
Niko
Did you see this thread?
http://www.s1cafe.com/wforum/viewtopic. ... highlight=
It talks about how the crema disappears when the pressure is set too low. His was running at 7.5 bars and the crema would dissipate in a matter of no time.
http://www.s1cafe.com/wforum/viewtopic. ... highlight=
It talks about how the crema disappears when the pressure is set too low. His was running at 7.5 bars and the crema would dissipate in a matter of no time.
-
ebohling
what's interesting is the mini-VII manual does not have instructions for either changing the pressure nor the 15 to 20amp. i need to increase the pressure (apparently) and i want to switch to 20 mode since i have a 20 outlet in the kitchen that the fridge is not on (just the dishwasher, but both shouldn't be running at the same time).
and it would seem (after reading VII manual online) that i need a pressure guage to increase pressure, true? if so, that stinks as i got none. ;)
and it would seem (after reading VII manual online) that i need a pressure guage to increase pressure, true? if so, that stinks as i got none. ;)
-
JohnB
You have a pressure gauge in your dual manometer so you don't need another one. I'm not sure whats involved with changing the pressure setting with a vibe pump, its a simple adjustment with the rotary pump. You might want to call the service dept at CC & ask them.
Switching from 15a to 20a only requires moving the toggle switch on top of the black box to the 20a position & having the correct plug on the machine. You should be able to see this if you remove the top cover.
Switching from 15a to 20a only requires moving the toggle switch on top of the black box to the 20a position & having the correct plug on the machine. You should be able to see this if you remove the top cover.
-
Niko
-
ebohling
-
ebohling
-
Niko
-
ebohling
yeah, i agree with you. my concern though is with the ADAPTER (20 --> 15 plug-in) that chris sent with the unit. it explicitly states not to use over 15amps. thinking about it...it's doubtful they make 20 -->15amp plug-in adapters that are built to withstand 20amp, but maybe i'm wrong.
am i making any sense?
am i making any sense?
-
JohnB
-
JohnB
Doesn't the adapter cord plug into the standard 20a plug that came on your machine? Why can't you just use the standard cord/plug? Too short?ebohling wrote:yeah, i agree with you. my concern though is with the ADAPTER (20 --> 15 plug-in) that chris sent with the unit. it explicitly states not to use over 15amps. thinking about it...it's doubtful they make 20 -->15amp plug-in adapters that are built to withstand 20amp, but maybe i'm wrong.
am i making any sense?
-
ebohling
knew i wasn't explaining myself well.
- all kitchen outlets are 20amp outlets with the STANDARD 3-prong plug-in that 15amp outlets use. in other words visually there are no differences in the outlets in our house. however, i know that all the kitchen outlets are 20amps because of the documentation/circuits in the power box. it's a custom home only a couple years old, so there were no shortcuts. ;)
- the standard mini-VII chord has the 20amp male plug, since i ordered the 15amp version, they flipped the switch inside the machine and gave me a 20 --> 15amp adapter. this adapter came with a white sheet of paper (from chris) that explicitly states it is for 15amp use only. hence my dilemma with my situation (without buying anything else).
i'm guessing my only option is to replace those 15amp outlets with a 20amp outlet so i do not need to use the 20 --> 15amp adapter. i would prefer NOT to do this, but i can't think of any other way. as i stated before i'm guessing they don't make a 20 --> 15amp adapter that is rated up to 20amps...would defeat the main purpose of wanting a 15amp adapter in the first place. haha
-
ebohling
-
jmcphail
Ebohling, are your choices these?
- change the receptacle on the wall.
- chop off LaSpaz's existing plug and wire up a new one with a rated part?
- make your own adapter out of properly rated parts?
From your post I understand that the existing receptacle, the wiring itself and the actual breaker in the box are all rated for 20A.
If all these things are true, I think I'd go for the third option - probably less than $20 in parts.
-
JohnB
-
jmcphail
-
ebohling
-
ebohling
"New" homes have 20 amp circuits in the kitchen but builders save a few cents by using standard 15 amp outlets. If you have a 20 amp breaker on the circuit you have 20 amp wiring and should just swap out the outlet for a 20 amp one (spend a few bucks more and buy a heavy duty one).
It takes about 5 minutes (or less depending on how far you have to walk to turn the breaker off).
It takes about 5 minutes (or less depending on how far you have to walk to turn the breaker off).
-
JohnB
-
mgwolf
It's very easy to change to a 20 amp receptacle. I bought one for maybe $6 or something at Home Depot. The screws are the same layout as on the 15 amp plug. Make sure you turn off the breaker first.
To whomever asked about adjusting the Mini brew pressure, you need to take the back off (fairly cumbersome). As you look at the back of the machine, about in the middle is a 4 inch long brass assembly with a clear plastic hose coming out the bottom. There's a b rass nut attached to the hose (has a black O-ring next to it) and this is the adjusting nut. I don't remember which way to raise/lower the brew pressure, but just keep turning it and checking the brew pressure.
Finally, regarding the original topic in this thread -- decreasing brew pressure throughout the shot -- perhaps I'm not preparing the shot well enough. I've been using 15.5 gms and using the WDT, but that doesn't fill the basket to the top. Any thoughts? Is this too little coffee? When I went to 16 or 16.5, it seemed like a lot of coffee was left on the screen which I thought was inadvisable because of lack of head space. Michael
-
JohnB
Does the Mini use the same brew head assy as the S1 V2? I regularly use 18+G in my doubles and have very little coffee left on the screen. What is there wipes off easily & isn't a problem. I dropped the screens after doing several 18g doubles & found little or nothing trapped in there.mgwolf wrote:
Finally, regarding the original topic in this thread -- decreasing brew pressure throughout the shot -- perhaps I'm not preparing the shot well enough. I've been using 15.5 gms and using the WDT, but that doesn't fill the basket to the top. Any thoughts? Is this too little coffee? When I went to 16 or 16.5, it seemed like a lot of coffee was left on the screen which I thought was inadvisable because of lack of head space. Michael
-
Niko
Very interestingmgwolf wrote: To whomever asked about adjusting the Mini brew pressure, you need to take the back off (fairly cumbersome). As you look at the back of the machine, about in the middle is a 4 inch long brass assembly with a clear plastic hose coming out the bottom. There's a brass nut attached to the hose (has a black O-ring next to it) and this is the adjusting nut. I don't remember which way to raise/lower the brew pressure, but just keep turning it and checking the brew pressure.
For the record, the back panel is NO PROBLEM whatsoever for me - it's the damn side panels that get me every time.
If I had a choice between waiting in line at the DMV for 6 hours or the installing the side panels of the Spaz....
it's a tough one but I'm leaning towards the DMV!
-
Mizspresso
This is totally OT, but your comment reminds me of the TV show 'Reaper'. Have you seen it? Ray Wise (of Twin Peaks fame) plays the devil who has a kid doing his bidding to recapture souls who have escaped from Hell. The kid has to capture them and take them to a drop off point.Niko wrote: If I had a choice between waiting in line at the DMV for 6 hours or the installing the side panels of the Spaz....
it's a tough one but I'm leaning towards the DMV!
When the kid asks where that is, Ray says 'You've heard of Hell on Earth, right? Well, it exists; it's called the DMV'
-
Niko
-
Cafesp
I've been through both Hells on Earth!Niko wrote:No it's not!Mizspresso wrote:Ray says 'You've heard of Hell on Earth, right? Well, it exists; it's called the DMV'
...it's called, installing the side panels on a La Spaziale Vivaldi S1
Not bad compare to days & nights on the stormy, rough sea without Coffee!
Cafesp
-
chas
- Vivaldi Dreamer
- Posts: 3044
- Joined: Wed Jun 02, 2004 11:52 pm
- Location: Central Maryland
- Contact:
I'm not going to tell you that this is the Holy Grail solution to the side panel replacement issue, but it sure helps me.
Be sure all four top screws that hold on the back panel and the front control panel are loosened before you try to line up the side panels and get the front and back panel metal edges properly aligned in the slots on the side. This gives you a lot more wiggle room to torque and curse things into place.
Then screw in the knurled knobs that hold on the side panels and finish up my retightening the top screws that hold on the front and back.
Chas
LM GS/3 & LaSpaziale Dream v 1.25 (US 120V)
Mazzer Kony E, Customized Rocky
Hottop P/B
LM GS/3 & LaSpaziale Dream v 1.25 (US 120V)
Mazzer Kony E, Customized Rocky
Hottop P/B
-
zoey
Warning:Warning: You are about to hear what very might well be just another dumb new guy comment. Please remove all children and those who are sensitive to moronic thoughts from the vicinity:::::
This may be stupid but, has anyone ever called Chris's and asked them if there is an easy technique? I would imagine that they have taken off more than their share of panels.
Again, dumb new guy alert
This may be stupid but, has anyone ever called Chris's and asked them if there is an easy technique? I would imagine that they have taken off more than their share of panels.
Again, dumb new guy alert